To tie a handcuff knot, follow these steps: Pass the rope around the wrist twice, cross the ends over, and then tuck them under the loops. Now, let’s dive deeper into how to tie a handcuff knot.
Handcuff knots are commonly used for various purposes such as camping, hiking, or even for special effects in magic tricks. This knot is designed to secure the wrists tightly, making it difficult for the person to escape. We will walk you through the step-by-step process of tying a handcuff knot, ensuring safety and proper usage.
Whether you are learning for survival skills or simply for fun, this guide will equip you with the knowledge needed to tie a handcuff knot confidently.
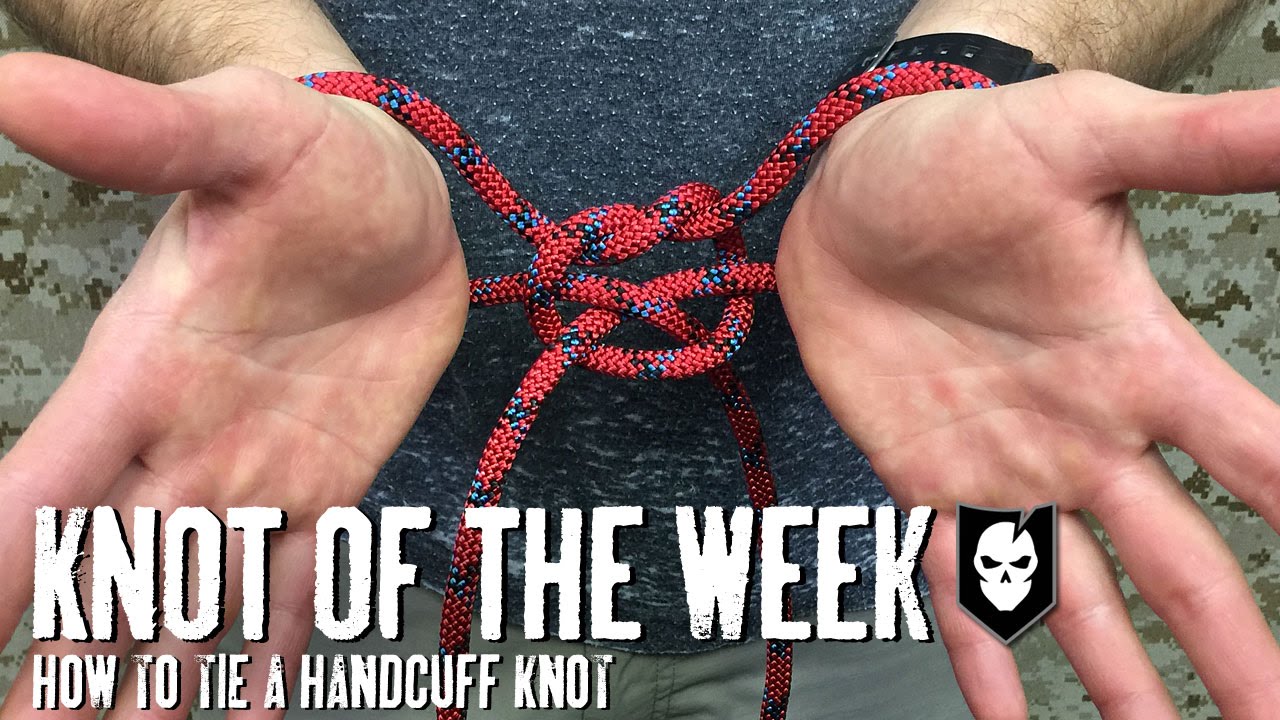
Credit: www.youtube.com
Materials Needed
When learning how to tie a handcuff knot, the first step is gathering the necessary materials. Having the right supplies is essential for successfully creating this knot. Below, we’ll outline the important materials you’ll need to get started!
Types Of Rope
To create a handcuff knot, you’ll need a strong and versatile rope. Options include paracord, nylon rope, or utility cord. The rope should be approximately 15-20 feet long to ensure you have enough length for the knot and secure fastening.
Scissors Or Knife
A sharp and reliable pair of scissors or a sharp knife is crucial for cutting and trimming the rope to the appropriate length and ensuring clean edges for a secure knot. Be sure to have one of these tools on hand before beginning the tying process.
Step-by-step Guide
Tying a handcuff knot can be a useful skill to have in various situations, whether you’re camping, hiking, or simply need to secure an item. Don’t worry, it’s easier than it sounds! In this step-by-step guide, we’ll walk you through the process of tying a handcuff knot.
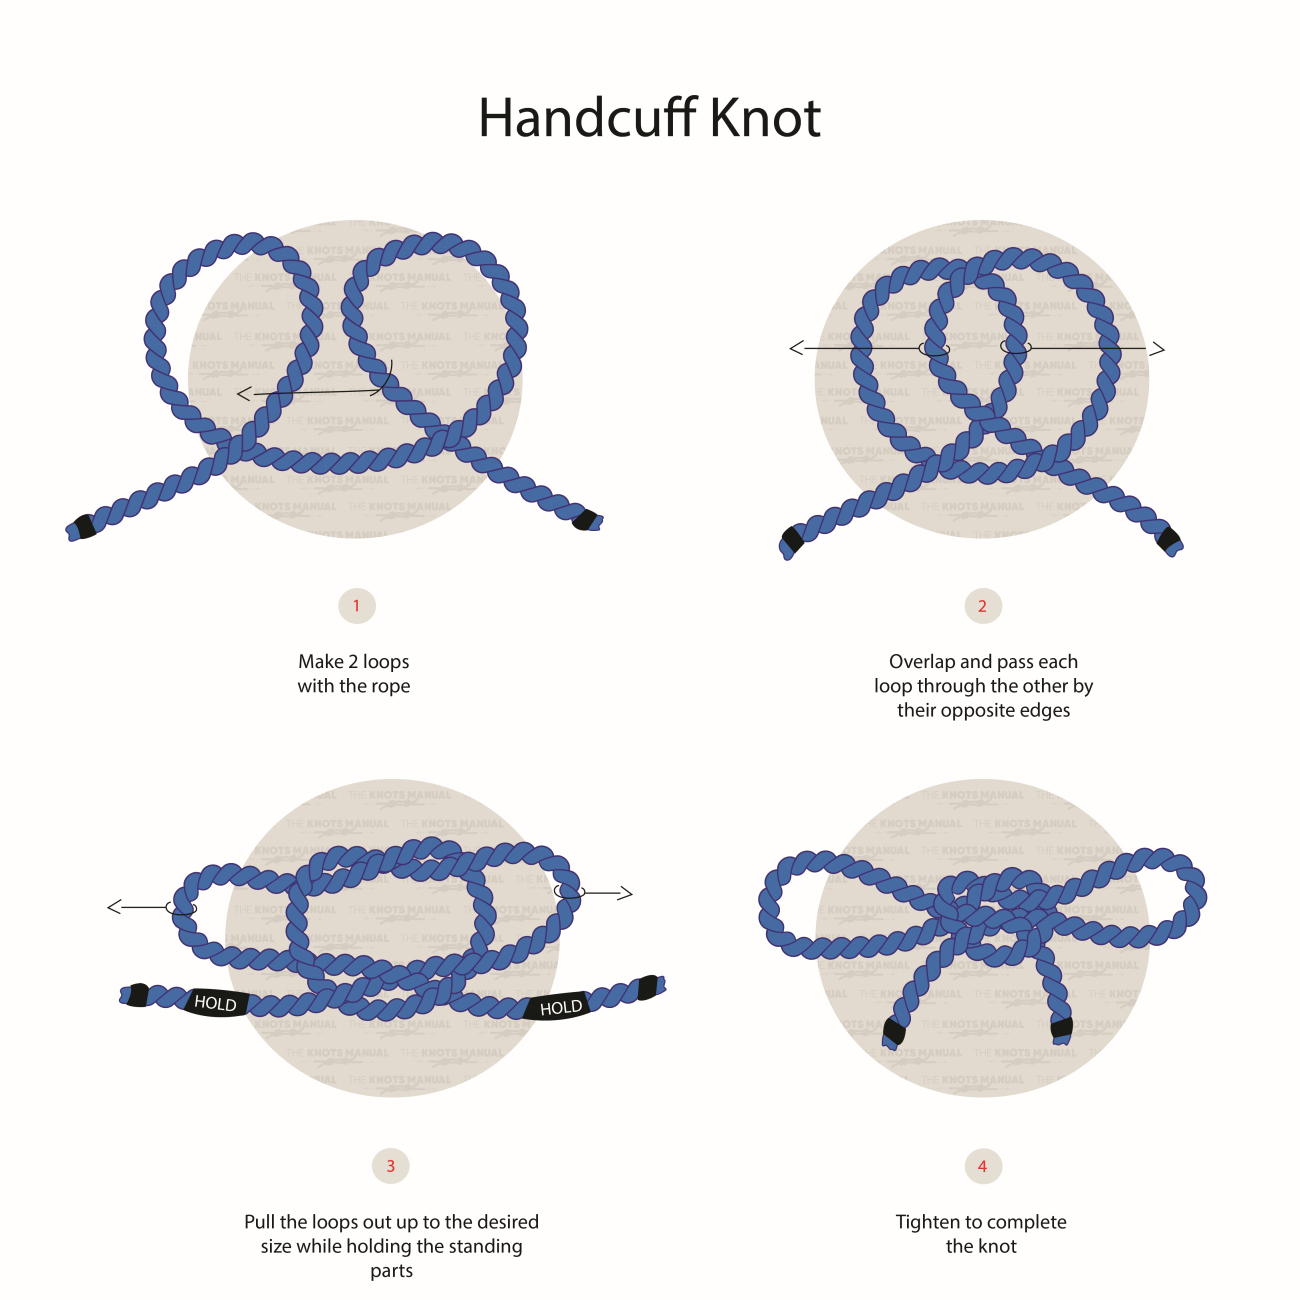
Creating The Initial Loop
To begin tying a handcuff knot, you’ll need to create an initial loop. Follow these steps:
- Start by taking one end of the rope in your dominant hand. This will be the working end of the rope.
- Hold the working end of the rope and use your other hand to create a loop, leaving a tail of about 12 inches. This loop will be referred to as the “running loop.”
- With the running loop in your non-dominant hand, bring the working end of the rope behind the running loop.
- Thread the working end of the rope through the running loop from front to back, making sure it passes behind the rope segment closest to you.
- Tighten the running loop by pulling on both ends of the rope, ensuring the knot is secure.
Making The Second Loop
The next step involves creating a second loop. Follow these instructions:
- After creating the initial loop, take the working end of the rope and fold it back towards the initial loop, forming a second loop parallel to the running loop.
- With the working end of the rope, pass it under the running loop and over the second loop.
- Pull the working end of the rope through the space between the running loop and the second loop.
- Tighten the second loop by pulling on both ends of the rope, ensuring the knot is secure.
Securing The Knot
Lastly, it’s time to secure the handcuff knot. Follow these final steps:
- Hold onto both loops and make sure the knot is snug.
- Wrap the working end of the rope around the loops two or three times, going in the same direction around the loops.
- Tuck the working end of the rope under the wraps you just created.
- Pull the working end of the rope to tighten the wraps and secure the knot.
And there you have it! You’ve successfully tied a handcuff knot. Remember to practice and familiarize yourself with the steps to ensure proper execution when you need it. Happy knotting!
Applications
Now that you have learned how to tie a handcuff knot, let’s explore its various applications. This versatile knot can be incredibly useful in a range of situations, from outdoor activities to survival scenarios.
Outdoor Activities
Whether you are an avid camper, hiker, or adventurer, the handcuff knot can come in handy. Its secure and easy-to-undo design makes it perfect for a variety of outdoor uses:
- Tying up gear: Use the handcuff knot to secure your gear, such as backpacks or camping equipment, to ensure it stays in place during your adventures.
- Clothesline: Forgot to pack a clothesline? No problem! Use the handcuff knot to create a makeshift clothesline and hang up your wet clothes to dry.
- Tarp setup: When setting up a tarp for shelter, the handcuff knot can be used to secure the corners, keeping it securely in place even in windy conditions.
Survival Situations
In survival situations, the ability to quickly secure items or create makeshift tools can be a matter of life and death. The handcuff knot offers the following benefits:
- Emergency shelter: If you find yourself without a tent or proper shelter, the handcuff knot can help you secure branches or tarp to create a basic shelter.
- Fishing: In a survival scenario near a body of water, use the handcuff knot to fashion a makeshift fishing line, allowing you to catch fish for sustenance.
- Splinting: If someone in your group sustains an injury, the handcuff knot can be used to create a splint, providing support until medical assistance is available.
As you can see, the handcuff knot has practical applications in both outdoor activities and survival situations. Mastering this knot can greatly enhance your preparedness and problem-solving skills in a variety of circumstances. Practice tying the handcuff knot regularly to ensure you can use it confidently when the need arises.
Credit: www.netknots.com
Safety Tips
When learning how to tie a handcuff knot, safety should always be a top priority. Whether you’re practicing to add a unique flair to your outdoor adventures or for emergency situations, following safety tips will help ensure secure and comfortable tying. Below, you’ll find essential safety tips to keep in mind as you perfect this useful knot.
Practice In A Controlled Environment
It’s crucial to practice tying a handcuff knot in a controlled and safe environment. Choose a space with ample room and minimal distractions, allowing you to focus on your technique without any external interference.
Check For Comfort And Tightness
As you practice, it’s important to periodically check for the comfort and tightness of the knot. By ensuring that the knot is secure but not overly tight, you can avoid discomfort or injury. Regularly assess the pressure and adjust as needed to maintain a safe and comfortable fit.
Credit: www.theknotsmanual.com
Frequently Asked Questions On How To Tie A Handcuff Knot
Does The Handcuff Knot Work?
Yes, the handcuff knot is an effective method for securing items. Its simplicity and strength make it a reliable choice.
How Do You Make Handcuffs Out Of A Necktie?
To make handcuffs out of a necktie, first, tie a knot in the middle. Then, fold the tie in half and loop it around wrists before securing tightly.
How Do You Tie Your Hands Behind Your Back?
To tie your hands behind your back, cross your arms and reach for opposite elbows. Use a long piece of fabric to bind your wrists together tightly. Then, secure the fabric with a knot, making sure it’s comfortable but secure.
Be cautious and seek help if needed.
How Do You Tie A Secure Loop Knot?
To tie a secure loop knot, follow these steps: 1. Make a loop with the rope. 2. Pass the end of the rope through the loop. 3. Bring the end around the loop and through again. 4. Tighten the knot by pulling both ends.
5. Ensure the knot is secure and won’t come undone.
Conclusion
Mastering the handcuff knot can be a valuable skill in various scenarios. With practice, anyone can quickly learn and tie this knot with ease. Whether for outdoor activities or emergency situations, knowing how to tie a handcuff knot can be a practical and beneficial skill to have in your repertoire.