To splice low voltage wire, strip the insulation off the ends, twist the exposed wires together, and secure with a wire nut or electrical tape. Splicing low voltage wire is a simple process that allows for the connection of two or more wires, ensuring a secure and reliable electrical connection.
By following these steps, you can easily splice low voltage wire and achieve a safe and efficient electrical system. Whether you are working on a home improvement project or need to repair a damaged wire, learning how to splice low voltage wire is a valuable skill that can be utilized in various electrical applications.
We will guide you through the process of splicing low voltage wire, providing you with all the necessary information and steps to successfully complete the task.

Credit: www.amazon.com
Choosing The Right Tools
Selecting The Appropriate Wire Strippers
When splicing low voltage wire, make sure to have wire strippers that match the wire gauge for precise cutting.
Strippers with adjustable settings ensure proper depth to prevent damage to the wire insulation.
Gathering Wire Connectors And Insulation Tape
Essential for a secure connection, wire connectors come in various types to accommodate different wire sizes.
- Choose insulation tape to seal and protect the splice from moisture and environmental factors.
Preparing The Wires
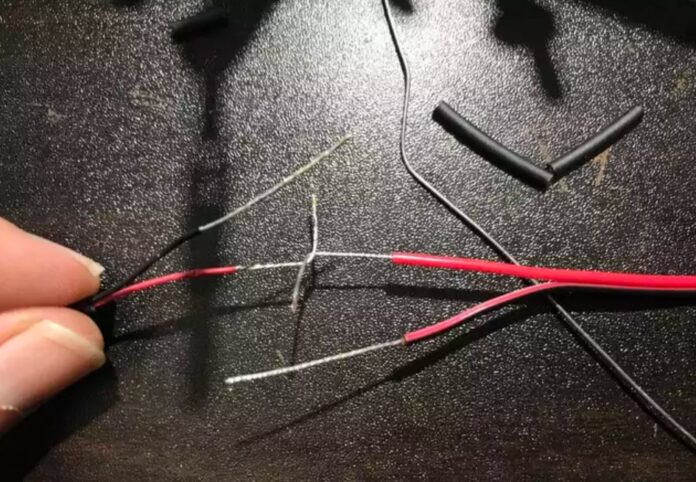
Before splicing low voltage wire, start by preparing the wires. Strip the insulation off each wire, ensuring the metal conductor is not damaged. Then, twist the exposed conductors together securely before adding insulation and sealing the splice to prevent any electrical hazards.
Measuring And Cutting The Wires
When it comes to splicing low voltage wires, preparation is key. The first step in preparing the wires is to measure and cut them to the desired lengths. Measuring the wires accurately ensures that they will fit together properly when spliced. To measure the wires, use a tape measure or ruler and mark the desired length by placing a small cut or a piece of electrical tape at the appropriate spot. Then, using wire cutters or a sharp knife, carefully cut the wires at the marked point. Remember to cut the wires cleanly and straight to avoid any issues during the splicing process.Stripping The Insulation
Next, you’ll need to strip the insulation from the ends of the wires. Stripping the insulation allows for a secure and proper connection when splicing the wires together. To strip the insulation, you will need a wire stripper tool. Place the wire into the appropriate slot on the wire stripper tool, and squeeze the handles together. The tool will cut through the insulation, allowing you to remove it easily. Be careful not to strip too much insulation, as this can expose too much bare wire and lead to short circuits or other electrical issues. After stripping the insulation, check the exposed wire to ensure it is clean and free from any damage or nicks.In summary, preparing the wires for splicing involves measuring and cutting them to the desired lengths, as well as stripping the insulation from the ends. Taking the time to accurately measure and cut the wires ensures a proper fit when spliced. Stripping the insulation allows for a secure and efficient connection between the wires. Proper wire preparation sets the stage for a successful splicing process and ensures a reliable electrical connection.
Splicing The Wires
Learn to splice low voltage wires for safe and efficient electrical connections. Follow step-by-step instructions for precise wire cutting and insulation removal. Enhance your DIY skills and ensure proper wire splicing techniques for reliable electrical systems.
When it comes to splicing low voltage wires, it is important to understand the correct procedure to ensure a secure and long-lasting connection. The process involves two essential steps: twisting and securing the wires together, and applying wire connectors. Let’s take a closer look at each step:Twisting And Securing The Wires Together
To begin, make sure you have stripped the insulation from the ends of the wires using wire strippers. This will expose the bare copper conductors, allowing for a proper connection. Once the wires are prepared, follow these steps: 1. Take the two stripped wire ends and hold them side by side. 2. Gently twist the exposed copper conductors together using your fingers. This will create a solid and reliable joint. 3. After twisting the wires, ensure the connection is tight and secure. A loose connection can lead to poor electrical conductivity and potential hazards. Remember to keep the wires as straight as possible during the twisting process for a neater and cleaner result.Applying Wire Connectors
Now that the wires are properly twisted together, it is time to apply wire connectors for added stability and insulation. Wire connectors are designed to securely hold the wires together while protecting them from moisture and other elements. Here’s how to apply them: 1. Choose an appropriate wire connector based on the gauge and number of wires you are splicing. Wire connectors come in different sizes, so it is important to select the right one for your specific needs. 2. Insert the twisted wires into the wire connector, making sure they are fully inserted. This will ensure a reliable and strong connection. 3. Use pliers to squeeze the wire connector tightly, securing the wires in place. This will prevent any movement or accidental disconnection. 4. Once the wire connector is securely fastened, give it a gentle tug to ensure it is firmly attached to the wires. By following these steps, you can splice low voltage wires with confidence, creating a secure and reliable connection. Remember to always adhere to safety guidelines and consult a professional if you are unsure about any aspect of the splicing process. Happy splicing!Credit: m.youtube.com
Ensuring Proper Insulation
Ensuring Proper Insulation is crucial when splicing low voltage wires to prevent electrical hazards.
Wrapping Wires With Insulation Tape
Begin by cutting a piece of insulation tape and wrapping it tightly around the spliced area.
- Make sure the tape overlaps and covers the exposed wires completely.
- Smooth out any wrinkles to ensure a secure and insulated connection.
Using Heat Shrink Tubing
Slide a piece of heat shrink tubing over the spliced wires and apply heat using a heat gun or lighter.
- Ensure the tubing shrinks evenly around the wires for effective insulation.
- Check for any gaps or exposed areas and reapply heat if needed.
Testing The Connection
When it comes to splicing low voltage wires, testing the connection is a crucial step to ensure the safety and efficiency of the electrical system. Testing the connection involves checking for continuity and verifying voltage levels.
Checking For Continuity
Continuity checks ensure that the wire splice is sound and that current can flow through the connection without interruption. Use a multimeter with the continuity setting to test the connection between the two spliced wires. Make sure there is no resistance, indicating an unobstructed flow of current.
Verifying Voltage Levels
After checking for continuity, it’s essential to verify the voltage levels to ensure that the wire splice can handle the electrical load without overheating. Use the multimeter to measure the voltage across the spliced wires. Make sure the reading matches the expected voltage level for the low voltage system.
Credit: midlandauthors.com
Frequently Asked Questions Of How To Splice Low Voltage Wire
Can You Join Low-voltage Cable?
Yes, you can join low-voltage cable by carefully connecting the wires together. This should be done by a professional to ensure proper installation and avoid any potential damage or safety hazards.
Can You Splice In Landscaping Wire?
Yes, you can splice in landscaping wire. It allows you to connect two ends together for extending or repairing your landscape lighting, irrigation systems, or other outdoor wiring needs. Ensure to follow proper techniques and use the right tools for a secure and durable connection.
How Do You Splice Two Low-voltage Wires Together?
To splice two low-voltage wires together, strip insulation, twist exposed ends, apply wire nut, and secure with electrical tape.
How Do You Splice 3 12v Wires?
To splice 3 12V wires, use a soldering iron to connect the wires together. Ensure they are clean and strip the insulation before soldering. Cover the splice with heat shrink tubing and secure with a heat gun for a reliable connection.
Conclusion
Understanding how to splice low voltage wire is a valuable skill for homeowners and DIY enthusiasts. With the right tools and proper technique, you can safely and effectively splice wires for various applications. Remember to follow safety precautions and refer to the manufacturer’s guidelines for best results.
Happy splicing!