To run a diagnostic on your Samsung dryer, follow these steps: 1) Ensure the dryer is powered off, 2) Press and hold the “Start/Pause” button and simultaneously turn the cycle selector knob clockwise. Write an introduction (around 120 words) that provides background information and context on running a diagnostic on a Samsung dryer: Running a diagnostic on your Samsung dryer can be helpful in identifying any issues or problems with its performance.
Instead of hiring a technician, you can perform a diagnostic test yourself, saving time and money. By following a few simple steps, you can quickly identify the problem and potentially fix it yourself. This can be especially useful if your dryer is displaying error codes or not functioning properly.
A diagnostic test will provide you with valuable information to troubleshoot the issue and determine necessary repairs. We will guide you through the process of running a diagnostic on your Samsung dryer, ensuring that you can effectively resolve any issues and restore your dryer’s functionality.
Getting Started
Getting your Samsung dryer up and running smoothly can often start with running a diagnostic. By following the steps outlined below, you can quickly get started and troubleshoot any issues with your appliance.
Locating The Model Number
Before running a diagnostic on your Samsung dryer, you’ll need to locate the model number. The model number is typically found on a sticker or metal plate on the dryer. Most commonly, it is located inside the door frame or on the back of the appliance. Once you’ve found the model number, take note of it as you may need it for reference during the diagnostic process.
Gathering Necessary Tools
Prior to initiating the diagnostic process, it’s important to gather the necessary tools. You’ll need a multimeter to test the electrical components, a screwdriver to access the interior components, and a flashlight for better visibility. Ensure these tools are easily accessible before you begin the diagnostic to streamline the process.
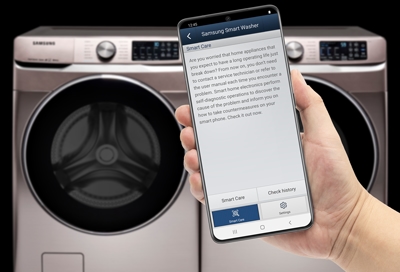
Credit: www.samsung.com
Running The Diagnostic Test
To run a diagnostic on your Samsung dryer, start by turning off the power. Press and hold the “Time Dry” and “Air Fluff” buttons simultaneously for 3 seconds. The display will show the error codes if any issues are detected.
Accessing Diagnostic Mode
To run a diagnostic test on your Samsung dryer, you need to access the diagnostic mode. Here’s how you can do it:
- Make sure the dryer is powered off and disconnected from the electrical outlet.
- Press and hold the Power button and the Start button simultaneously for three to five seconds.
- Release the buttons once the display lights up.
Once you have successfully accessed the diagnostic mode, you can proceed to selecting the diagnostic test.
Selecting The Diagnostic Test
After accessing the diagnostic mode, you can select the specific diagnostic test you want to run. Follow these steps:
- Rotate the cycle selector knob to navigate through the available tests.
- Stop at the desired test and wait for a few seconds.
- The dryer will automatically begin the selected test once it detects the setting.
It’s important to note that each test is designed to diagnose a different aspect of your dryer’s functionality. Refer to your Samsung dryer’s manual to understand the specific tests available and their purposes.
Running a diagnostic test on your Samsung dryer can help identify any potential issues or malfunctions. It provides valuable information that can assist you or a repair technician in troubleshooting and resolving problems.
Remember to consult your dryer’s manual for detailed instructions and safety precautions before attempting any diagnostic tests.
Interpreting The Results
Once you have successfully run a diagnostic on your Samsung dryer, the next step is to interpret the results. Understanding these results will help you identify the specific issues with your appliance and take the necessary steps to fix them. In this section, we will discuss two key aspects of interpreting the results: Understanding Error Codes and Checking for Common Issues.
Understanding Error Codes
Error codes are numerical or alphabetical codes that indicate a specific problem with your Samsung dryer. These codes serve as a useful tool to narrow down the issue and provide valuable information for troubleshooting. When you view the results of the diagnostic test, you may come across error codes such as E1, E2, or F3. Each code corresponds to a different problem, and by referring to your dryer’s manual or searching online, you can find detailed explanations of what each code means.
By deciphering the error codes, you can gain insight into the root cause of the problem and take appropriate action. Some error codes may require simple fixes that you can do yourself, while others may indicate more complex issues that need professional assistance. Regardless of the code, it is essential to address the problem promptly to prevent further damage to your dryer.
Checking For Common Issues
In addition to error codes, there are several common issues you may encounter while running a diagnostic on your Samsung dryer. These issues can help you pinpoint the problem and guide your troubleshooting efforts. Here are some common areas to check:
| Common Issue | Possible Solution |
|---|---|
| The dryer is not heating | Check if the heating element is faulty and replace if necessary. |
| The dryer is not spinning | Inspect the belt, motor, and pulley for any signs of damage or wear. Replace if needed. |
| The dryer is not drying clothes properly | Clean the lint filter and check the ventilation system for any blockages or restrictions. |
Remember, these common issues are just a starting point for troubleshooting your Samsung dryer. The diagnostic results combined with a thorough inspection will help you uncover the exact cause of the problem. Once you have identified the issue, you can take the necessary steps to repair or replace the faulty parts and get your dryer up and running again.
Credit: washinglounge.com
Performing Basic Maintenance
When it comes to maintaining your Samsung dryer, performing basic maintenance is essential to ensure its proper functioning and longevity. By regularly cleaning the lint filter and inspecting the ventilation system, you can prevent potential issues and maintain the efficiency of your dryer. Let’s delve into these basic maintenance tasks in detail.
Cleaning The Lint Filter
Cleaning the lint filter is a simple yet crucial maintenance task for your Samsung dryer. Ensure to clean the lint filter after every cycle to avoid blockages and maintain optimal airflow. Here’s how you can do it:
- Locate the lint filter, usually located inside the door rim or at the top of the dryer.
- Pull out the lint filter gently and remove any accumulated lint by hand or using a soft brush.
- After cleaning, reinsert the lint filter back into place, ensuring it fits snugly.
Inspecting Ventilation System
The ventilation system plays a vital role in the proper functioning of your Samsung dryer. Regular inspection is necessary to prevent potential hazards. Here’s how to inspect the ventilation system:
- Check the exterior vent to ensure there are no obstructions such as debris or bird nests.
- Inspect the ductwork for any signs of damage or blockages and clear them if necessary.
- Ensure that the vent hood opens and closes freely, allowing proper airflow.
Seeking Professional Help
If you encounter complex issues with your Samsung dryer after running a diagnostic, consider seeking professional help to ensure proper diagnosis and repair.
Contacting Samsung Support
Get in touch with Samsung Support for assistance by phone, email, or live chat on their official website.
Hiring A Technician
If the problem persists, hire a certified technician to inspect and repair your Samsung dryer.
Credit: washinglounge.com
Frequently Asked Questions Of How Do I Run A Diagnostic On My Samsung Dryer
How Do I Put My Dryer In Diagnostic Mode?
To put your dryer in diagnostic mode, first, ensure it’s turned off. Then, press and hold the “more time” and “less time” buttons simultaneously for 3 seconds. This will activate the diagnostic mode and display error codes if there are any issues.
How Do I Run A Test On My Samsung Dryer?
To run a test on your Samsung dryer, follow these steps: 1. Start by ensuring the dryer is properly plugged in and the power is turned on. 2. Choose a test mode or cycle, such as the timed dry or sensor dry option.
3. Load the dryer with a small load of laundry. 4. Adjust any necessary settings, like the temperature or dryness level. 5. Press the start button and let the dryer complete the cycle to test its functionality.
How Do I Find The Error Code On My Samsung Dryer?
To find the error code on your Samsung dryer, follow these steps: 1. Locate the display panel on the front of your dryer. 2. Press and hold the “Temp” and “Time+” buttons simultaneously for about 3 seconds. 3. The code will then appear on the display, indicating the specific error.
4. Refer to your dryer’s manual or Samsung’s website for a list of error codes and their corresponding meanings.
How Do I Run Diagnostics On My Samsung Front Loader?
To run diagnostics on your Samsung front loader, press the Power button and turn the appliance off. Press and hold the Start/Pause button for 5 seconds to enter diagnostic mode. Use the selector dial to navigate through the different tests available.
Conclusion
So, now you have the know-how to troubleshoot your Samsung dryer with ease. Running a diagnostic helps identify any issues and save you time and money. By following these steps, you can keep your dryer in top condition and ensure it operates efficiently.
Stay informed and take the necessary steps to maintain your appliance!